> ## Documentation Index
> Fetch the complete documentation index at: https://docs.disqoai.com/llms.txt
> Use this file to discover all available pages before exploring further.
# Overview
> Learn how to create and manage automated workflows in disQo.ai
Automate your business processes with disQo.ai Workflows. Streamline repetitive tasks, integrate with your tools, and boost productivity—all from a visual, no-code interface.
## What are Workflows?
Workflows in disQo.ai let you automate multi-step processes by connecting triggers, actions, integrations, and knowledge base context. You can create workflows from scratch or use pre-built templates to get started quickly.
Explore ready-to-use templates for common business, QA, and engineering tasks.
See all available actions and integrations you can use in your workflows.
## Getting Started: Creating a Workflow
Navigate to from the sidebar to view and manage your workflows.
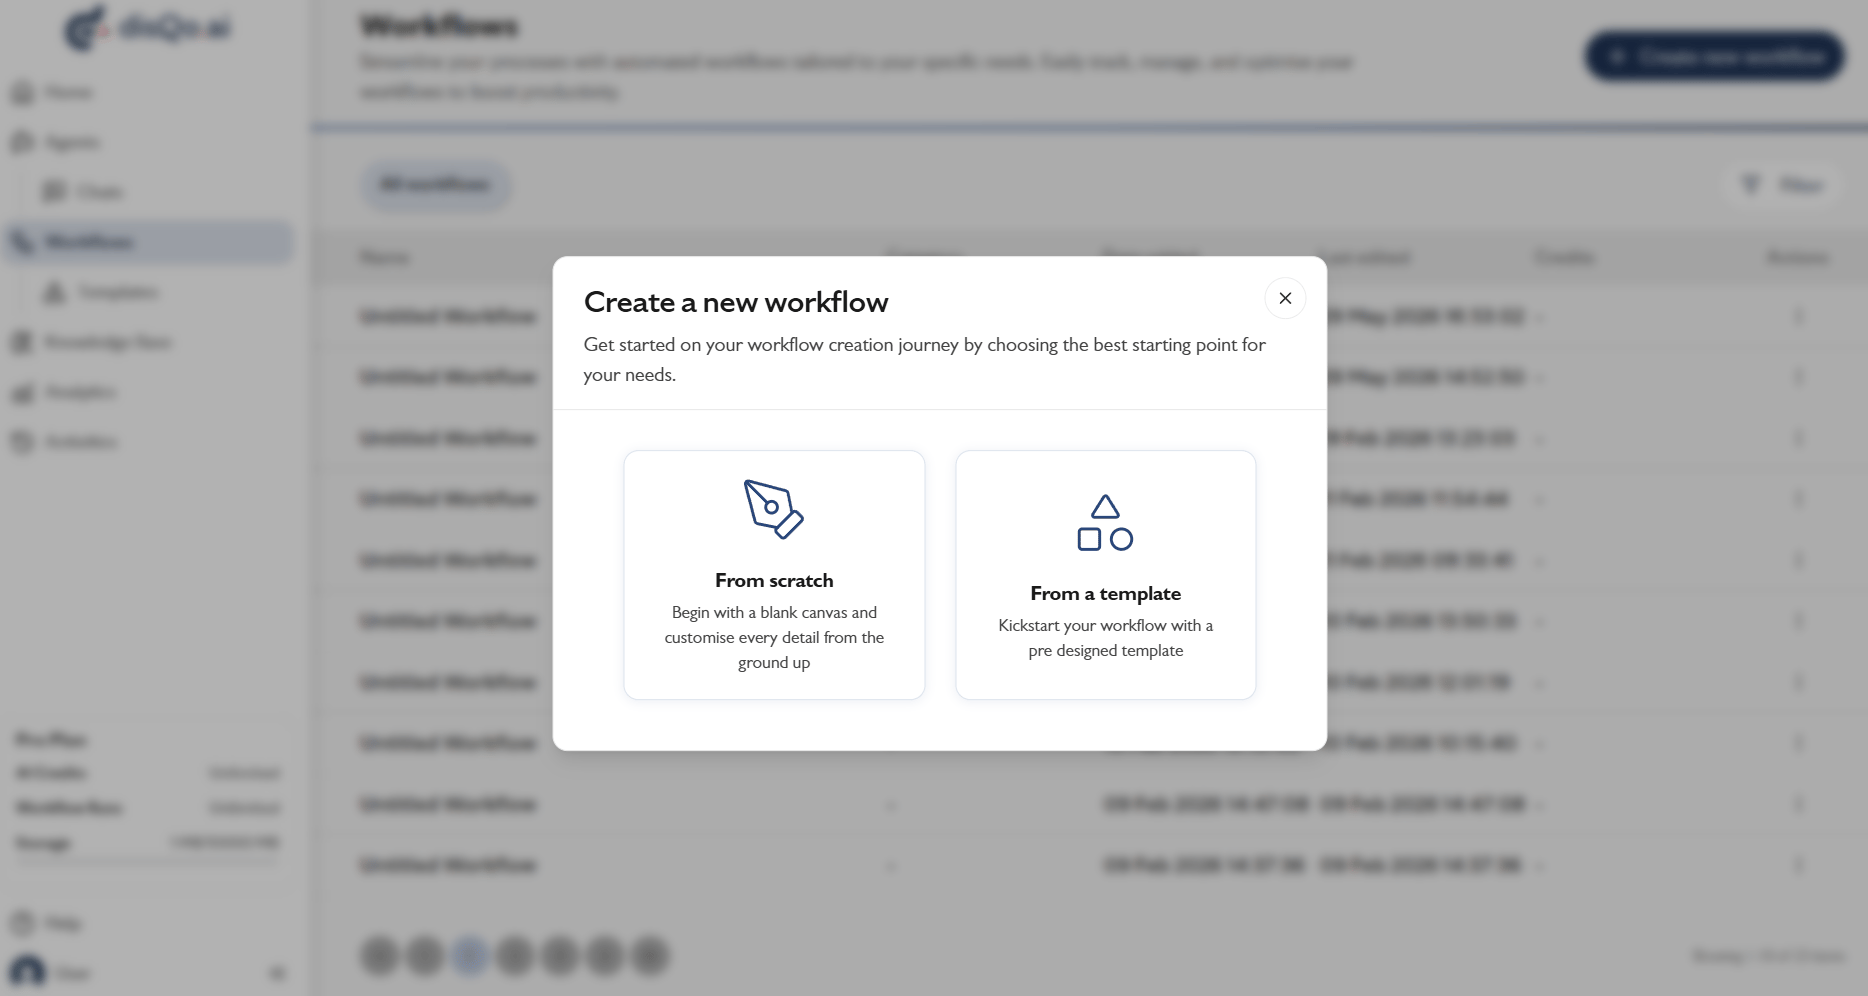
Click to start. Choose to build from scratch or use a template.
 Browse and select from featured, business analysis, engineering, or QA templates.
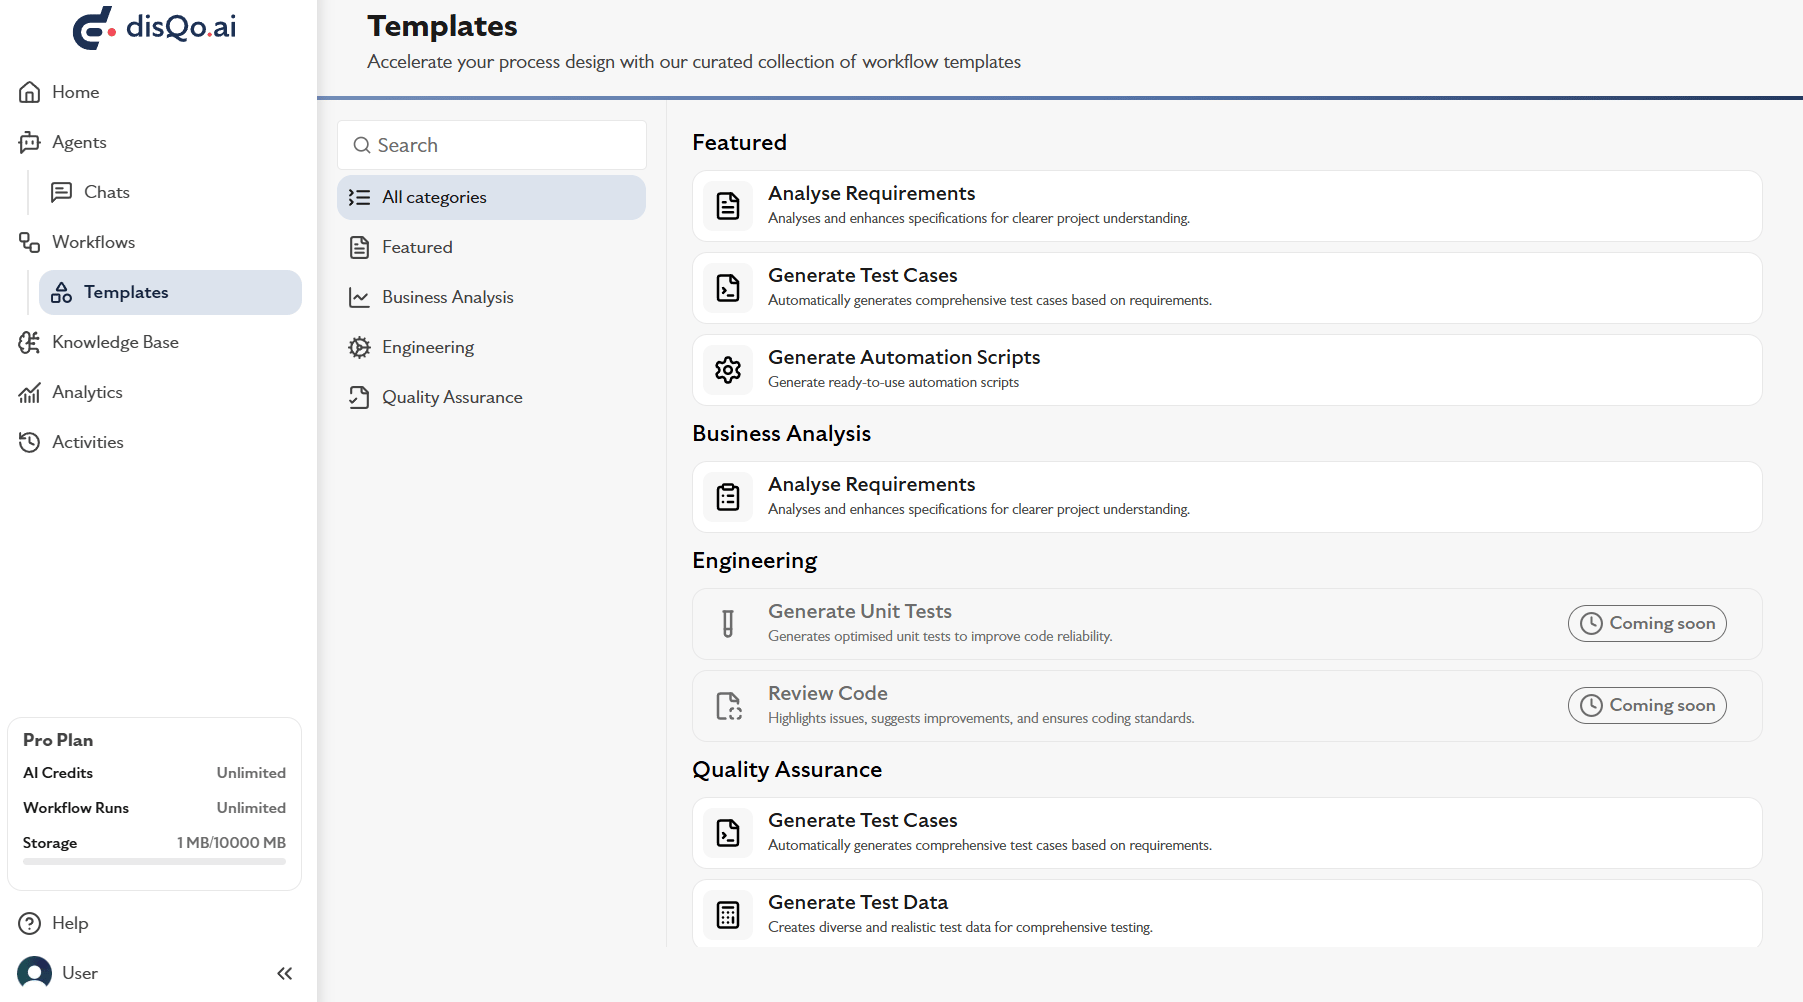 For a full list of templates and their details, see the page.
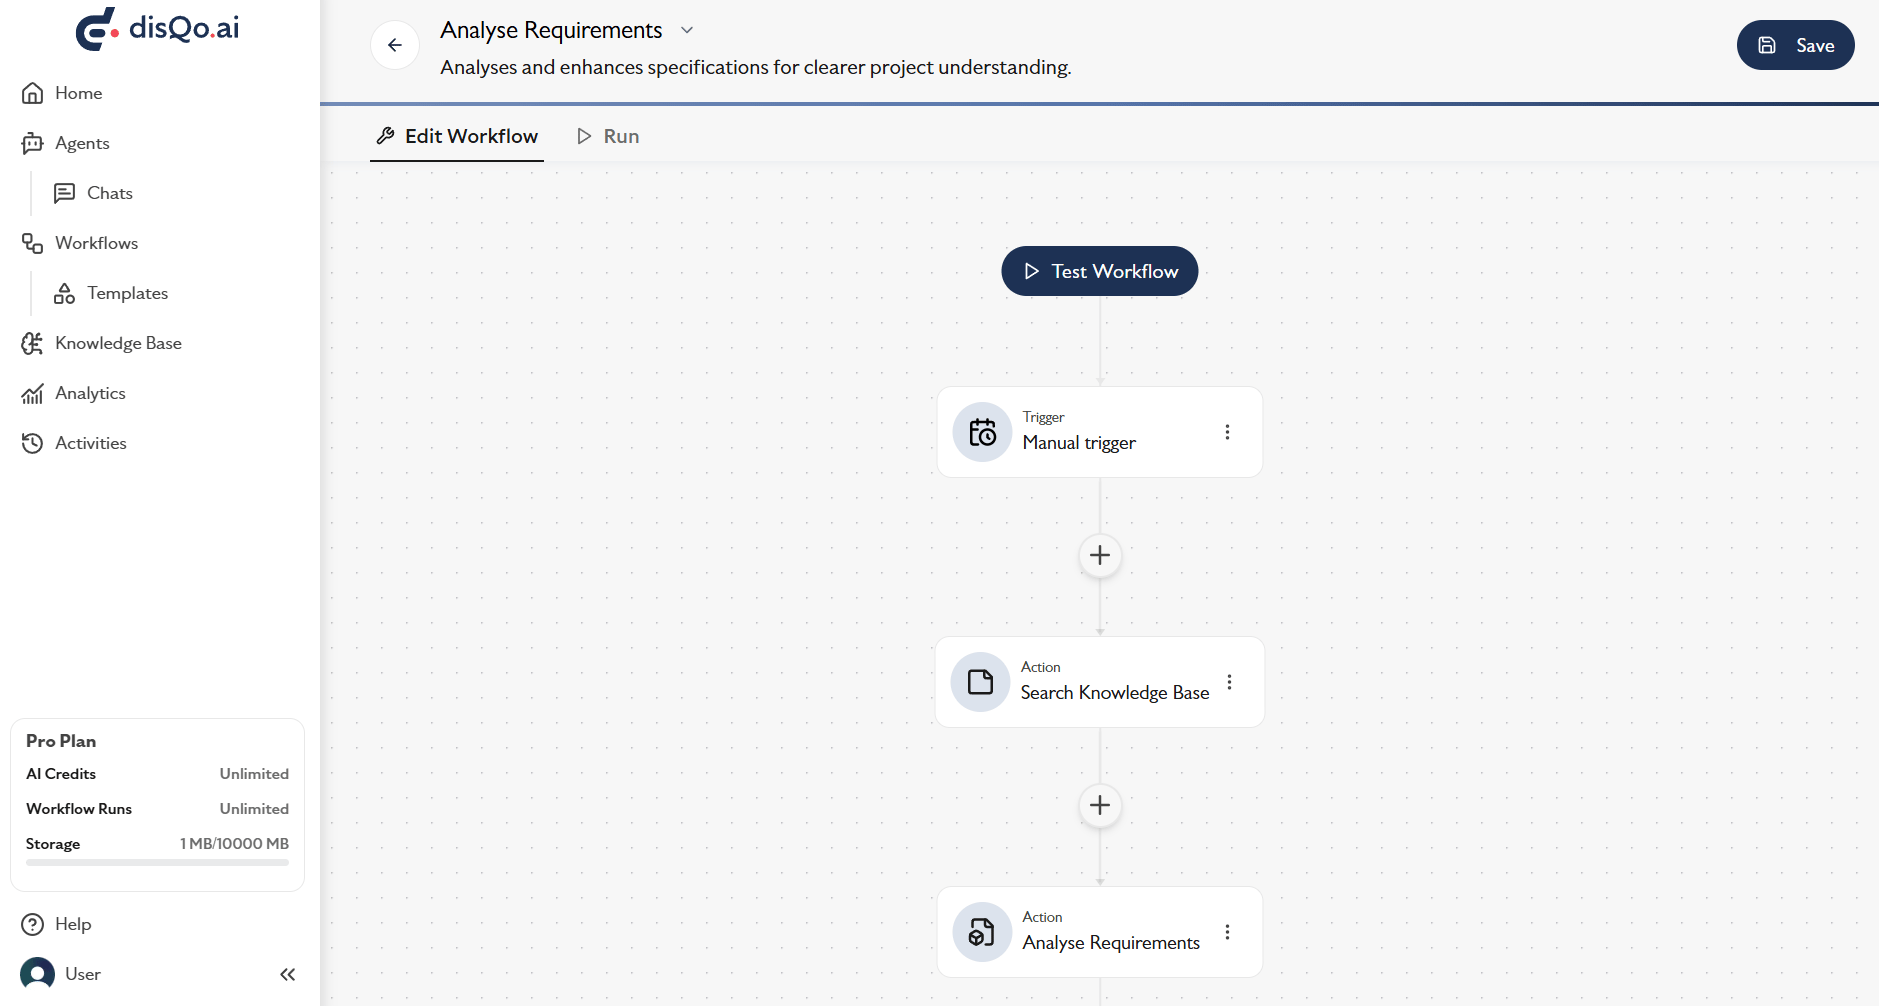
Use the visual workflow canvas to add triggers, actions, and integrations. You can also add context via knowledge base files — these provide background information, domain-specific terms, or process definitions that help AI agents interpret tasks more intelligently. Drag and drop to customise your automation.
For a full list of templates and their details, see the page.
Use the visual workflow canvas to add triggers, actions, and integrations. You can also add context via knowledge base files — these provide background information, domain-specific terms, or process definitions that help AI agents interpret tasks more intelligently. Drag and drop to customise your automation.
 Choose from a variety of actions (e.g., get Jira tickets, analyse requirements, generate test cases, accessibility agent) to automate your flow. Each action performs a specific AI-assisted task.
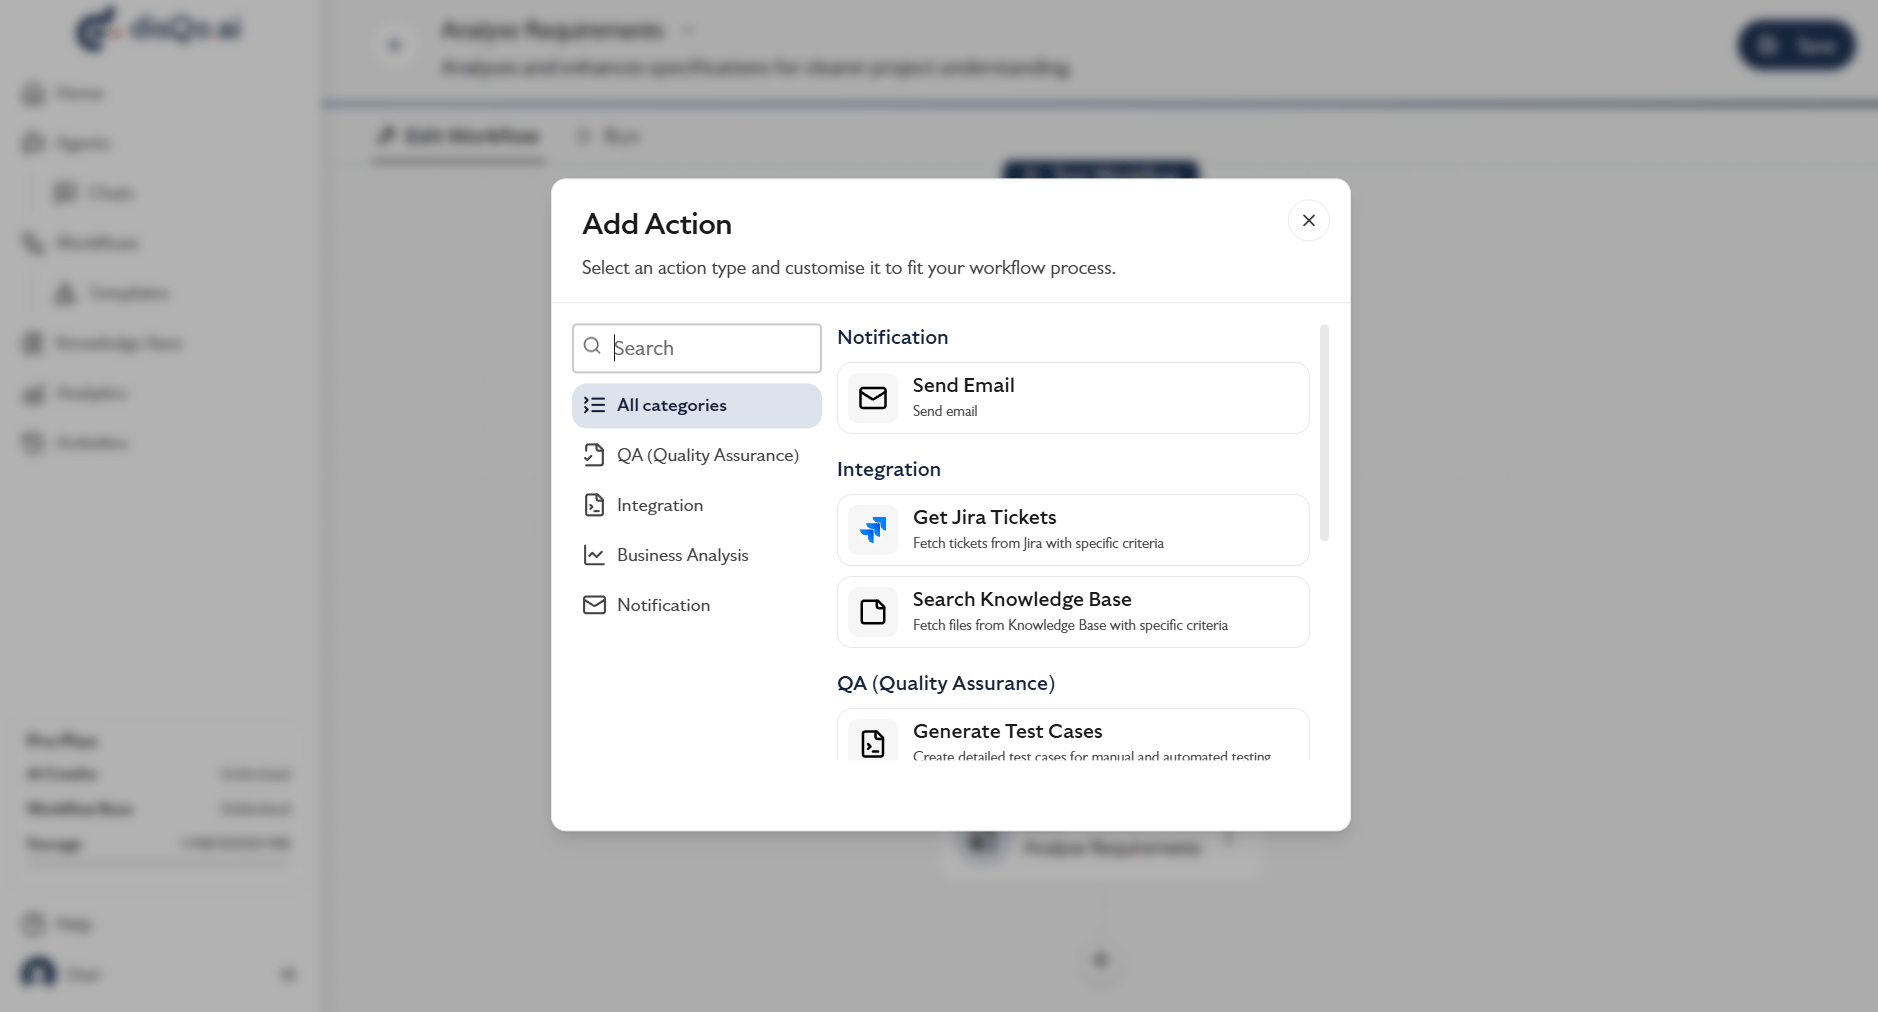 For a detailed explanation of each action and its configuration, visit the page.
To get the best results from an agent (like Analyse Requirements), provide: Context – Refer to knowledge base files that contain background or supporting info. Task – Clearly describe what you want the agent to do, e.g., "Analyse the requirements in The User Story 1 from the attached file".
For a detailed explanation of each action and its configuration, visit the page.
To get the best results from an agent (like Analyse Requirements), provide: Context – Refer to knowledge base files that contain background or supporting info. Task – Clearly describe what you want the agent to do, e.g., "Analyse the requirements in The User Story 1 from the attached file".
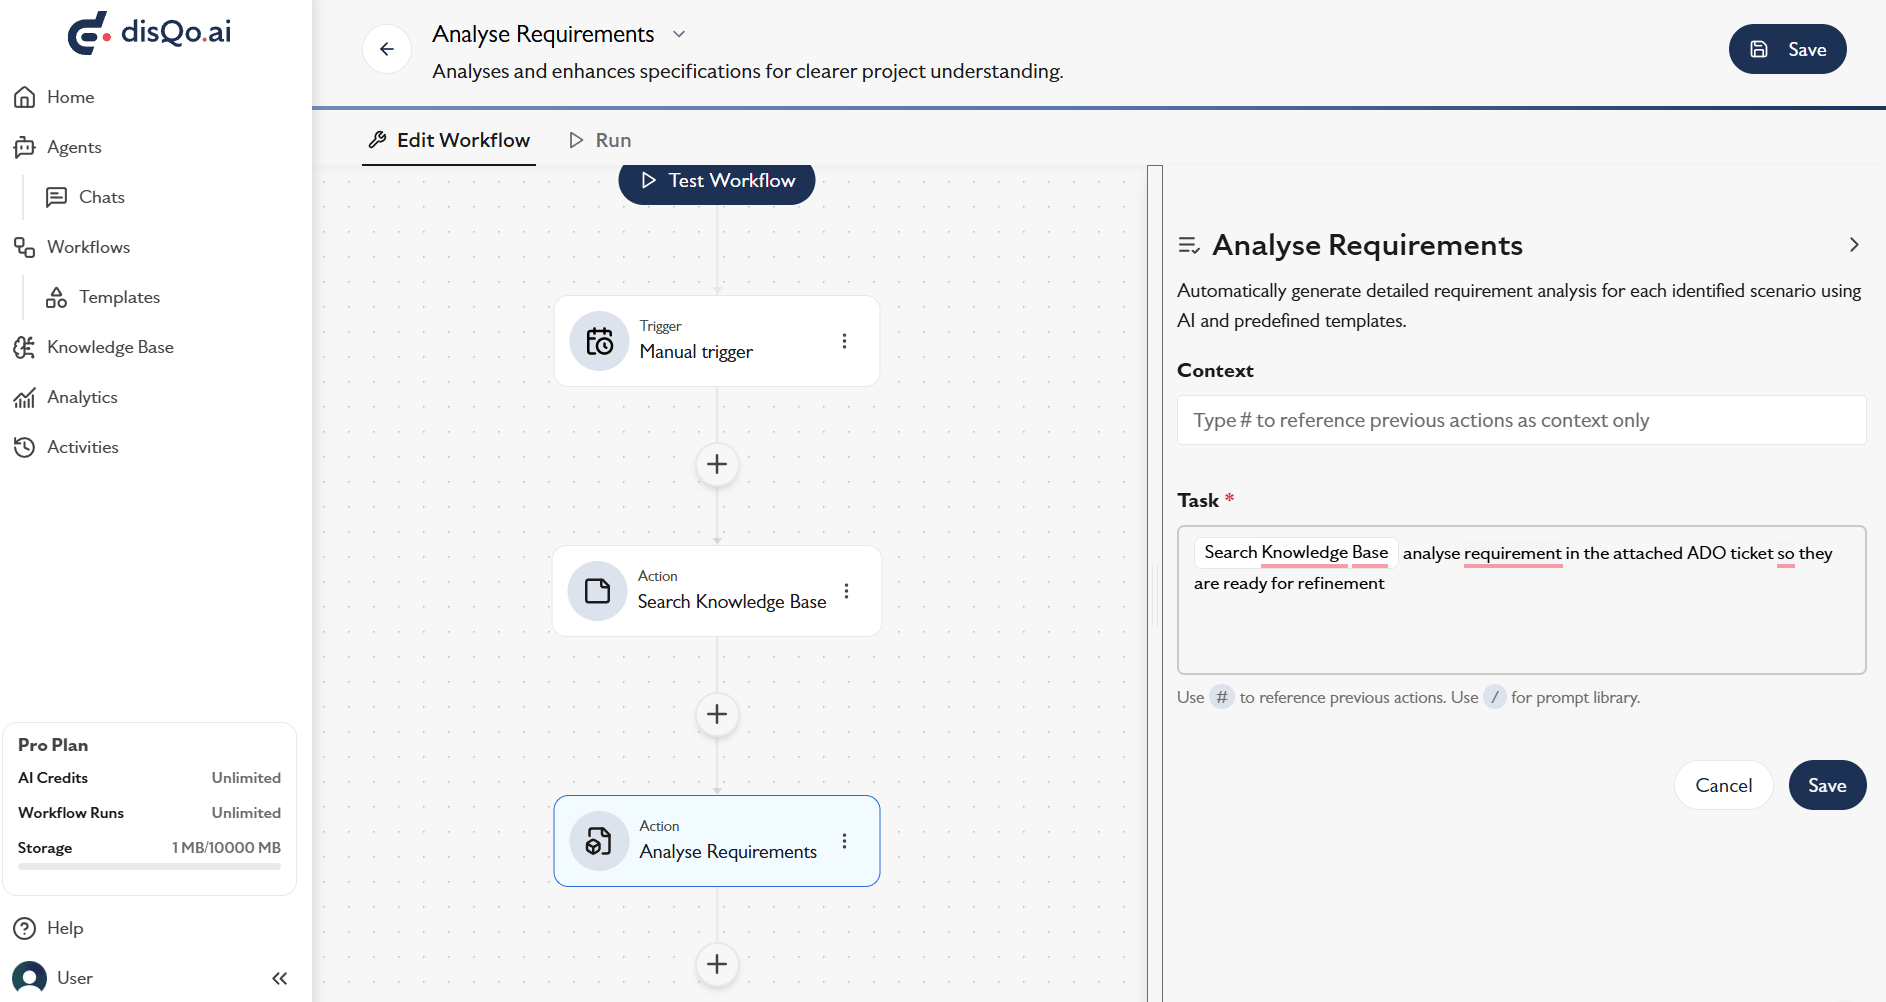 Context defines what the agent knows. Task defines what the agent should do.
## Using Criteria Builder in Workflows
The Criteria Builder lets you define which Jira or Azure DevOps tickets a workflow should retrieve when it runs. You can use **Basic** criteria to build a filter directly in disQo.ai, or use **Custom** criteria to select filters or queries already saved in the connected Jira or ADO project.
In workflows, criteria are saved as part of the workflow node configuration. This means the workflow will apply the same criteria each time it runs, including scheduled runs. The matching tickets may change over time as new tickets are created, updated, or moved between statuses, sprints, or assignees.
Context defines what the agent knows. Task defines what the agent should do.
## Using Criteria Builder in Workflows
The Criteria Builder lets you define which Jira or Azure DevOps tickets a workflow should retrieve when it runs. You can use **Basic** criteria to build a filter directly in disQo.ai, or use **Custom** criteria to select filters or queries already saved in the connected Jira or ADO project.
In workflows, criteria are saved as part of the workflow node configuration. This means the workflow will apply the same criteria each time it runs, including scheduled runs. The matching tickets may change over time as new tickets are created, updated, or moved between statuses, sprints, or assignees.
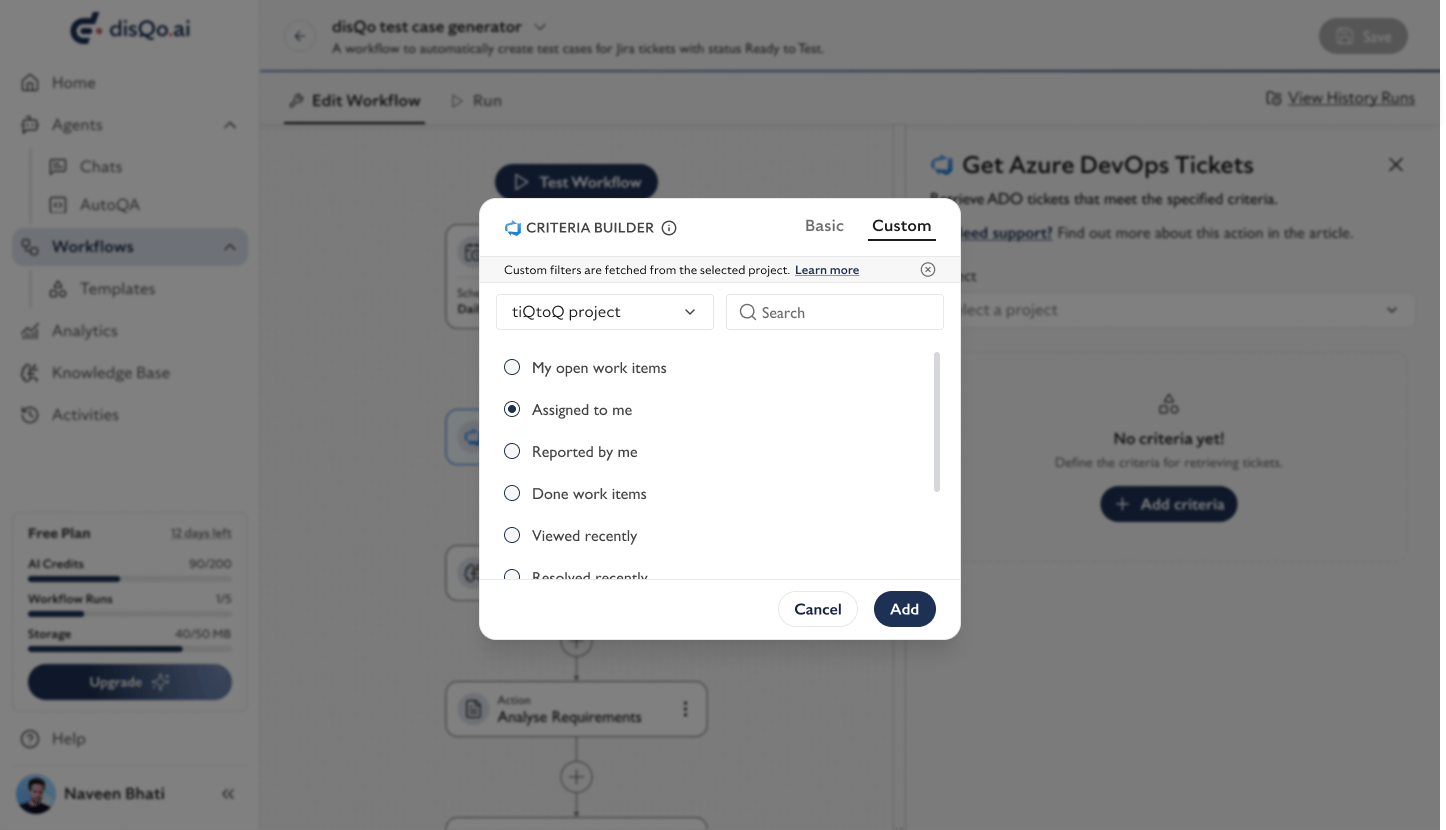 For example, you can configure a workflow to retrieve all tickets assigned to you in the current sprint, or use a saved Jira filter or ADO query maintained by your team.
## Next Steps
Why not try building a workflow with these steps?
1. Add a **Scheduled Trigger**, for example, every Monday at 8:00 AM.
2. Add the **Accessibility Agent** and provide your company website URL.
3. Add the **Analyse Requirements** action with a task such as:\
*Review the failed accessibility items and create user stories based on them.*
4. Add the **Generate Test Cases** action with a task such as:\
*Create test cases from the user stories generated in the previous action.*
5. Add the **Send Email** action with a message such as:\
*Your test cases are ready.*
Once the workflow has run, go to [disQo.ai](http://disQo.ai) to review and use your generated test cases.
You're ready to build your first workflow! For advanced tips and troubleshooting, see the detailed guides in each section.
For example, you can configure a workflow to retrieve all tickets assigned to you in the current sprint, or use a saved Jira filter or ADO query maintained by your team.
## Next Steps
Why not try building a workflow with these steps?
1. Add a **Scheduled Trigger**, for example, every Monday at 8:00 AM.
2. Add the **Accessibility Agent** and provide your company website URL.
3. Add the **Analyse Requirements** action with a task such as:\
*Review the failed accessibility items and create user stories based on them.*
4. Add the **Generate Test Cases** action with a task such as:\
*Create test cases from the user stories generated in the previous action.*
5. Add the **Send Email** action with a message such as:\
*Your test cases are ready.*
Once the workflow has run, go to [disQo.ai](http://disQo.ai) to review and use your generated test cases.
You're ready to build your first workflow! For advanced tips and troubleshooting, see the detailed guides in each section.