Starting a New Chat
- Click the Start new chat button in the top right corner.
- Select the agent you wish to use (e.g., Test Case Generator, Test Data Generator, Automation Scripts Generator, Generate Unit Tests, etc.).
- Enter a clear task or instruction into the chat box.
- (Optional but recommended) Attach files and/or Jira/Azure DevOps/Confluence items to provide relevant context.
Chat History
- All your conversations are securely stored and can be revisited at any time.
- The chat history table displays:
- Chat name (with date and custom titles)
- Agent used in the chat
- Date added and Last edited
- Actions menu for managing chats
- Use the search bar to quickly find previous chats.
- Filter and paginate through your chat history as needed.
Tip: Files are used as supporting context only — the agent does not treat them as the task. Always include your actual request in the chat box (e.g., “Analyse the requirements in the attached document”). This ensures the agent knows what action to take and improves the quality of the response.
Chat Interface
- Each chat displays the full conversation with the selected agent.
- Chats have memory, and you can follow up with them on the output, e.g., ask to regenerate a specific test case, adding required details that you didn’t specify initially.
- You can view generated outputs, such as test cases, scripts, or requirement analyses, directly in the chat window.
- Download or copy results as needed.
- You can upload output to Jira or Azure DevOps directly or rewrite existing items in these systems and leave a comment under your item.
Tip: Use chats to collaborate with agents for Business Analysis, Quality Assurance, and Engineering tasks. All your work is saved for future reference.
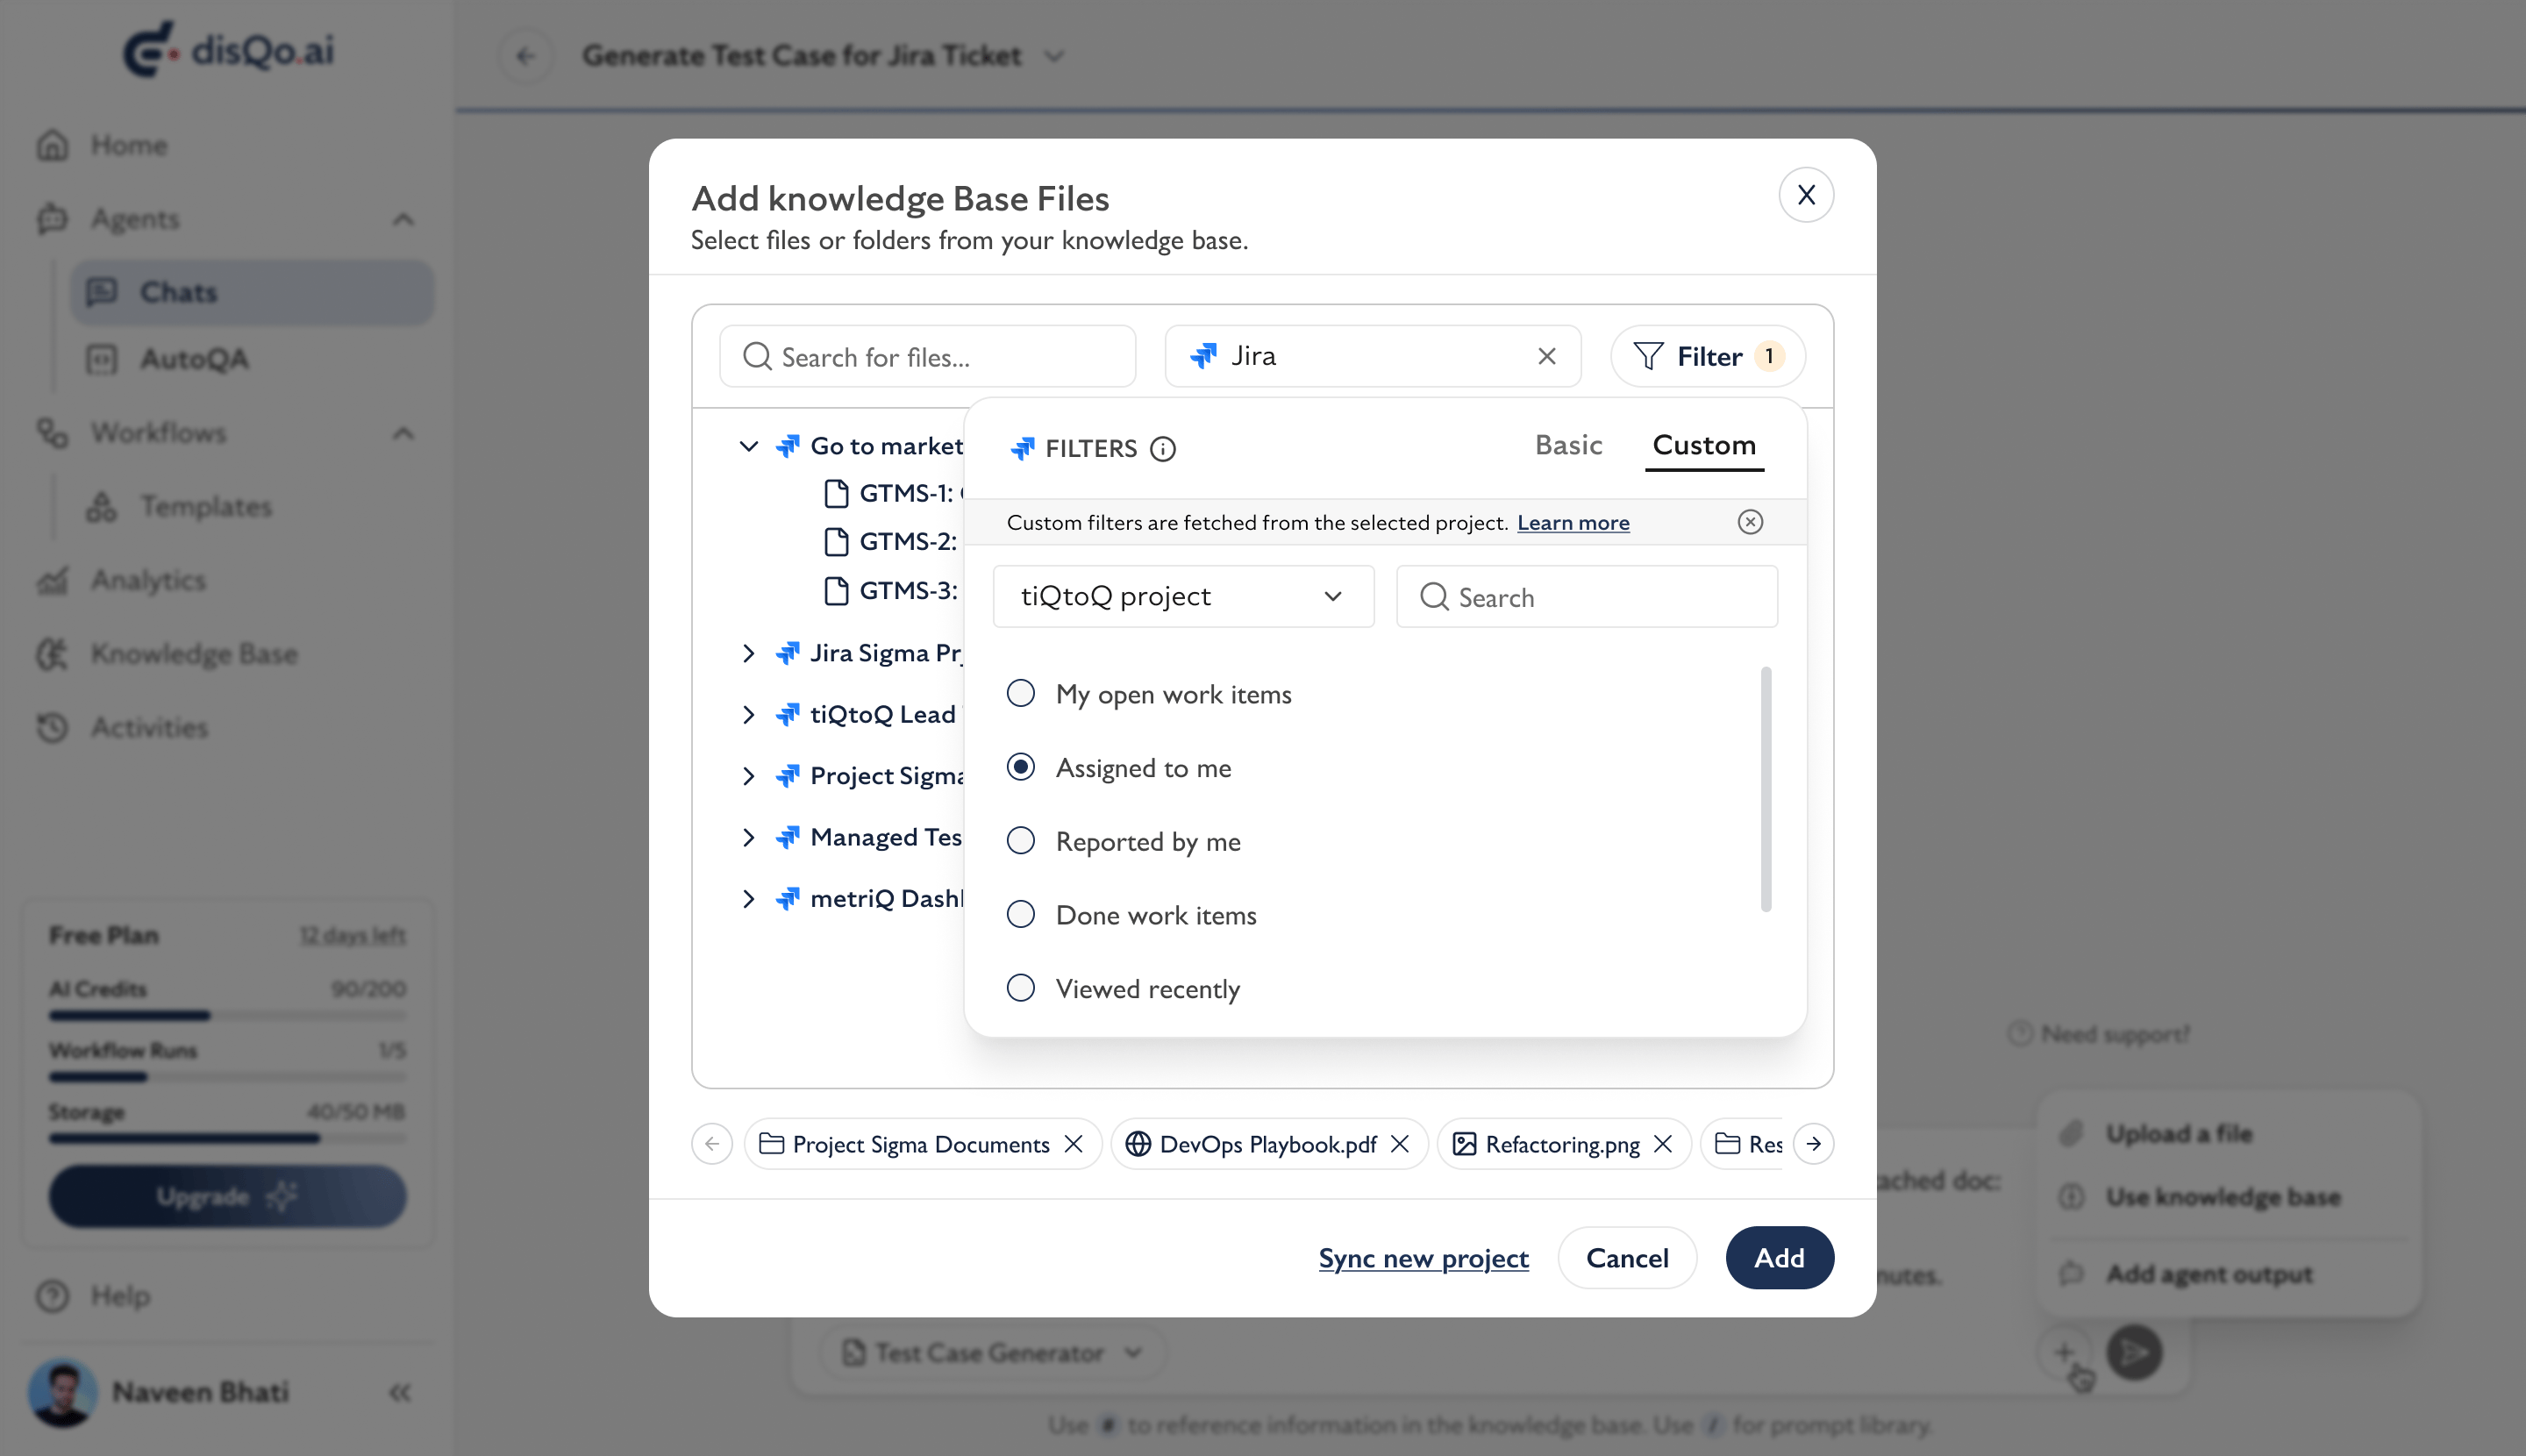
Custom filters and queries
For Jira, custom filters are saved project-level filters that help users quickly narrow the items shown in the knowledge base picker. Once a Jira project is selected, the system fetches the available custom filters for that project and displays them as a single-select list, so only one custom filter can be applied at a time. For Azure DevOps, the same behaviour applies using saved queries. After the user selects an ADO project, the system loads the queries available for that project and presents them as a single-select list. Because these are project-specific, the available options may differ depending on the selected project and the user’s access.